Optimal Oven Drying: Preserve Basil's Flavor and Nutrients Year-Round
Few herbs bring the vibrant aroma and distinct taste to culinary creations quite like fresh basil. From classic pesto to Mediterranean salads, its peppery, sweet, and slightly minty notes are indispensable. However, the fleeting lifespan of fresh basil often leaves home cooks wishing for a way to capture its essence for longer. Enter oven drying – a remarkably simple yet effective technique that allows you to enjoy the delightful flavors of basil all year round, even when fresh sprigs are out of season.
Drying basil in the oven is not just about extending its shelf life; it’s about preserving its unique character. While air drying and dehydrators are popular methods, oven drying stands out for its speed and accessibility, making it an excellent choice for anyone looking to easily maintain a steady supply of this beloved herb. By carefully controlling the temperature and drying duration, you can ensure your basil retains much of its signature flavor and essential nutrients, transforming delicate leaves into a potent, long-lasting pantry staple.
This comprehensive guide will walk you through everything you need to know about how to dry basil in the oven, from selecting the perfect leaves to proper storage, ensuring you achieve the best possible results every time.
The Art of Preparation: From Garden to Oven
The success of your oven-dried basil hinges significantly on the quality and preparation of the fresh leaves. Starting with pristine, vibrant basil is non-negotiable for preserving optimal flavor and aroma.
Harvesting and Selecting the Best Basil Leaves
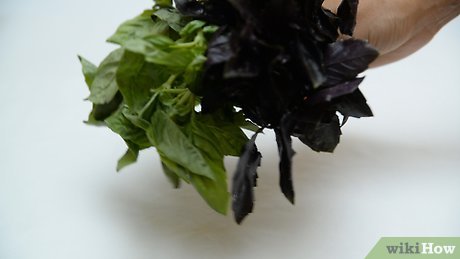
If you're lucky enough to grow your own basil, timing your harvest is crucial. The ideal time to pick basil leaves is in the morning, just after the dew has dried but before the sun has warmed them intensely. This is when the leaves' essential oils, responsible for their potent flavor and aroma, are at their peak. When selecting leaves, look for those that are:
- Vibrant Green: A rich, healthy green color indicates freshness.
- Free from Blemishes: Avoid leaves with any signs of wilting, discoloration (yellowing or browning), holes, or insect damage. These imperfections can affect the flavor and longevity of your dried herb.
- Fully Developed: Choose mature leaves rather than tiny new sprouts, as they carry more flavor.
Whether you're harvesting from your garden or buying from a store, always prioritize the freshest, healthiest-looking basil you can find.
Thorough Cleaning for Purity
Before any drying can commence, your basil leaves need a meticulous cleaning to remove any dirt, dust, or potential residues. This step is vital because any contaminants left on the leaves will be dried onto them permanently, affecting both taste and hygiene.
- Initial Debris Removal: Gently lay your harvested basil leaves on a clean kitchen counter or cutting board. Use your fingers or a soft, clean brush to lightly remove any visible debris, tiny insects, or loose dirt particles.
- Washing with Cool Water: Fill a large bowl or a clean sink with cool water. Submerge the basil leaves, gently swishing them around to dislodge any remaining dirt. You might be surprised by how much sediment collects at the bottom.
- Repeat if Necessary: Drain the water and repeat the washing process if the water still appears murky or if there's any visible dirt remaining. Continue until the water runs completely clear, ensuring your basil is impeccably clean.
Handling the basil gently throughout this process is important to avoid bruising the delicate leaves, which can release enzymes that degrade flavor.
Crucial Step: Drying the Leaves (Pre-Oven)
Perhaps the most overlooked but critical step before oven drying is ensuring your basil leaves are thoroughly dry. Excess moisture will lead to steaming rather than drying in the oven, potentially resulting in mold or a soggy product instead of crisp, flavorful dried basil. Here are the most effective methods:
- Paper Towels: Lay the basil leaves in a single layer on clean paper towels. Gently pat the tops with more paper towels, absorbing as much surface moisture as possible. Be careful not to crush or bruise the leaves.
- Clean Kitchen Towels: Similar to paper towels, you can spread the basil on a clean, absorbent kitchen towel. Gently roll up the towel with the basil inside, applying light pressure to wick away moisture. Let it sit for a few minutes for maximum absorption.
- Salad Spinner: For efficiency and gentleness, a salad spinner is an excellent tool. Place the washed basil leaves inside the spinner basket and spin until the leaves are visibly dry. This method is often the quickest and most effective at removing residual water without damaging the leaves.
Regardless of the method you choose, ensure the leaves are completely dry to the touch before proceeding to the oven. This diligence in preparation lays the foundation for perfectly dried basil. For more detailed insights on how to prepare your basil for drying, consult our Quick Guide to Oven Drying Basil: Prep, Temp, & Time.
Mastering the Oven Drying Process
With your basil impeccably clean and dry, you're ready to transform it into a long-lasting culinary treasure. The key to successful oven drying lies in precision with temperature and attention to airflow.
Gather Your Tools
The equipment needed for this process is minimal and likely already in your kitchen:
- Fresh, clean, and thoroughly dried basil leaves
- A standard baking sheet or an oven-safe tray
- Parchment paper (highly recommended to prevent sticking and aid cleanup)
- Your oven
Temperature Control: The Golden Rule
This is arguably the most critical aspect of oven drying basil. The goal is to dehydrate the leaves gently, not to cook or roast them. High temperatures will cause the basil to cook, turn brown, lose its vibrant color, and, most importantly, evaporate the delicate essential oils that give it flavor and aroma. Preheat your oven to its absolute lowest temperature setting. This is typically between 140-170°F (60-77°C). Some ovens may even have a "warm" or "keep warm" setting that works well. Using a separate oven thermometer can help verify your oven's true temperature, as built-in thermostats can sometimes be inaccurate.
Arrangement for Even Drying
Once your oven is preheated, line your baking sheet with parchment paper. This prevents the basil from sticking and makes transfer easier. Then, arrange the basil leaves on the prepared tray in a single, even layer. It's crucial that the leaves do not overlap. Overlapping leaves will trap moisture, causing them to steam instead of dry, leading to uneven drying and potential spoilage. If you have a large batch, use multiple baking sheets.
The Drying Cycle: Time and Airflow
Place the baking sheet(s) into the preheated oven. This next step is paramount for effective drying: leave the oven door slightly ajar. Prop it open with a wooden spoon or a heat-resistant oven mitt. This small gap allows the moisture evaporating from the basil leaves to escape the oven cavity. Without this airflow, the moisture would simply recirculate, slowing down the drying process and risking a steamy environment that could "cook" the basil.
The drying time can vary significantly based on several factors, including the humidity in your environment, the thickness of your basil leaves, and the accuracy of your oven's temperature. Generally, basil will take anywhere from 1.5 to 4 hours to dry completely. We recommend checking on your basil every 30-45 minutes. You may also want to rotate the trays if using multiple, to ensure even exposure.
You'll know your basil is perfectly dry when the leaves are brittle and crumble easily to the touch. They should feel completely crisp and snap rather than bend. If they still feel pliable or soft, they need more time. Continue drying in increments until they reach the desired crispness. For more extensive details on the drying process itself, including visual cues, check out our article: How to Oven Dry Basil: Preserve Freshness All Year.
Storing Your Oven-Dried Basil for Lasting Flavor
Once your basil is perfectly dry, proper storage is essential to maintain its flavor, aroma, and longevity. Improper storage can lead to moisture reabsorption, spoilage, or loss of potency.
Cooling Down
After removing the baking sheet from the oven, allow the dried basil leaves to cool completely on the tray at room temperature. This step is important because transferring warm basil to an airtight container can create condensation inside, reintroducing moisture and risking mold growth.
Crushing and Packaging
Once cooled, you have a couple of options for preparing your dried basil for storage:
- Whole Leaves: You can store the leaves whole, which can help retain more of their essential oils until they are crushed just before use.
- Crushed: Gently crush the leaves between your fingers, or for a finer consistency, use a mortar and pestle. Some prefer to gently pulse them in a clean coffee grinder or food processor, but be careful not to turn them into a fine powder unless that's your preference, as it can diminish flavor over time.
Store your dried basil in airtight containers. Glass jars with tight-fitting lids are ideal, but heavy-duty, sealable plastic bags can also work. Ensure the container is completely dry before adding the basil. Don't forget to label and date your containers; this helps track freshness and prevents guesswork.
Optimal Storage Conditions
To maximize the shelf life and potency of your oven-dried basil, store the containers in a cool, dark, and dry place. A pantry or cupboard away from direct sunlight, heat sources (like the stove or oven), and areas with high humidity (like above a dishwasher) is perfect. Direct light and heat can degrade the basil's color, flavor, and beneficial compounds over time.
Properly stored, oven-dried basil can retain its quality for 6 months to 1 year. While it won't spoil quickly after this period, its flavor and aroma will gradually diminish. You can tell if your dried basil has lost its potency if it no longer has a noticeable fragrance when you rub a small amount between your fingers.
Tips for Optimal Oven Drying & Troubleshooting
Even with a clear guide, a few extra tips and an understanding of common pitfalls can elevate your basil drying game.
- Patience is a Virtue: Resist the temptation to speed up the process by increasing the oven temperature. Low and slow is the mantra for preserving those precious essential oils. Burnt basil is flavorless basil.
- Monitor Closely: Every oven is different. Your oven's lowest setting might run hotter or cooler than average. Stay engaged with the drying process, checking and rotating your trays as needed. A small amount of variability is normal, so learn to trust the visual and tactile cues of the basil.
- Uniformity: Try to dry leaves of similar size and thickness together on the same tray. This ensures more uniform drying times and prevents some leaves from over-drying while others are still moist.
- Don't Overload: Avoid cramming too many leaves onto a single tray. Proper air circulation is key, and overcrowding will hinder it, leading to uneven drying.
Troubleshooting Common Issues:
- Basil is not crisping up: This usually means it needs more time in the oven, or the oven door was not ajar enough to allow moisture to escape. Ensure continuous airflow.
- Basil is browning or burning: The oven temperature is likely too high. Recheck your setting with an oven thermometer if possible. Remove any burnt leaves, as they will impart a bitter taste.
- Basil still feels soft or pliable after cooling: It's not fully dry. Place it back in the oven for additional time, checking frequently. Storing partially dried basil will lead to mold.
Once you've mastered basil, feel free to experiment with other herbs! Many tender-leafed herbs like oregano, thyme, and mint can also be successfully dried using this same gentle oven method.
Conclusion
Drying basil in the oven is an incredibly rewarding and straightforward process that empowers you to preserve the quintessential taste of summer's bounty. By meticulously preparing your leaves, maintaining a low oven temperature, ensuring proper airflow, and storing your dried herb correctly, you can guarantee a supply of aromatic, flavorful basil for months to come. This simple technique transforms a perishable fresh herb into a versatile, long-lasting ingredient, ready to infuse your winter dishes with a touch of Mediterranean sunshine. Embrace this easy method and keep basil's vibrant essence at your fingertips, enhancing your culinary creations whenever inspiration strikes.
